
The beginning
2020-08-27
First things first, what's FPV?
FPV stands for First Person View, and means you experience something from the viewpoint of a character, or the cockpit or front seat of a vehicle driven by a character.
In our case we drive drones, or quadcopter, and thanks to a camera in the drone, the pilot gets to experience flying as if he or she was inside the drone, all through a pair of goggles similar to what people know as virtual reality goggles.
Here is a video examples of why I thought this hobby was so cool:
In my case, I met a friend who was into FPV and showed me some low quality video of what he was doing in his backyard, and I got hooked directly. I didn’t even know that this hobby existed. I mean, I knew about “drones” and how people are filming, or Amazon wants to deliver packages with them, but I didn’t know you could control a drone the way they do in the film above.
And then I started my research. How can I do the same?
Starting with the radio
| My friend advised me to buy a remote and get a simulator. He wasn’t very specific about what control was the best, he mentioned the FrSky Taranis Q7, and vaguely something about a Jumper. | ||
|
I then proceeded to buy the cheapest version of FrSky, the X9 Lite, which once I understood that it was not multiprotocol, and I was marrying myself to FrSky and it’s bully way to treat its customer, I decided to sell in less than a week. The Radiomaster TX16S (https://nordfpv.com/products/radiomaster-tx16s-hall) didn’t exist at that time, and I went in a hunt for the Jumper T16, which I found and bought. If I had to find a radio today I’ll go for the Radiomaster without thinking twice. The next step was to get into a simulator. Many recommended Velocidrone, and I liked it because it could run on my Windows and Linux machine and it was inexpensive. I started to play with it, found how difficult it was to control the drone for the first time, but the steep learning curve just became a challenge more than a problem. |
|
|
| The friend that got me into all this uses DLR, and I decided to give it a test. It was ok, and I really like the fact that it has some kind of tutorial for new pilots, but I still find better Velocidrone, and it’s my default simulator when the weather is not ok to fly out, or I want to practice a move before going and crashing my drone. | ||

The first drone

Many will say that you should start with a 3” drone because it’s easy to fly almost anywhere. Some will say that a 5” is actually easier to fly, but it requires more space. Some will argue you should completely build your first drone from scratch, some others will tell you to buy an already built machine.
I bought a TinyHawk Freestyle as my first drone. A 3” already built freestyle drone, and after a few hours in the simulator I was desperate to test my new toy.
I turned it on in my garden, I tried to lift it up, and it went directly into my neighbour’s tree. I definitely needed more hours in the simulator.
The second time was much better given the extra hours I put on the simulator. I could fly around a bit, enjoy that feeling of flying and seeing everything in my goggles. I came back home to send a message to my friend to thank him for introducing me to the FPV world. I had just literally flown!, but there was no chance in hell I could land correctly.
It’s easy to imagine that after crashing every time I tried to land, plus some other times just flying, the TinyHawk just couldn’t hold it more and started to give up.
First time repairing a drone
Here is where those decisions made in the beginning started to hurt. A 3” drone is a very small machine. The solder pads are tiny, the cables are minimal and I have never gotten used to using a magnifier to work on electronics. To make the story short, I could fix the TinyHawk a couple of times, but it was never a very good job and it kept returning to the working bench until one day I ended up burning a condensator with my solder tip and bye bye TinyHawk, it was fun!
The experience of fixing the Tinyhawk was interesting, but I wanted to be able to do a better job. I did some soldering during my university days, and I worked with electronics then, I can’t really imagine a person completely fresh doing work on a 3” like this and doing something that will hold for long.
Therefore, if I was to start all over again, I will take a 5” like the Cidora (https://nordfpv.com/collections/drones/products/cidora-sl5-e-4s-fpv-drone). It has space to work, the solder pads are a bit bigger, and many pieces just plugs in, no need to solder every cable, besides, it’s is kind of easier to control a 5” the first time you are flying, or at least that’s how it was for me, it may depend on the drone you select, but that was my experience and what I’ve heard as well.
Goggles
The next part to talk about when it comes beginning with FPV is the goggles. Googles are a crucial part of the FPV experience. They’ll sit in your face for a long time, and they are the ones providing you with the image of what you are doing.
The FPV world is going through a transition right now between analog and digital, and the goggles could easily be the most expensive part of your setup. Yes you can find cheap goggles, but let’s be honest, the coolest part of flying a drone is having the viewpoint of the drone in the air, so you don’t want to be cheap with the part that actually allows you to do this.
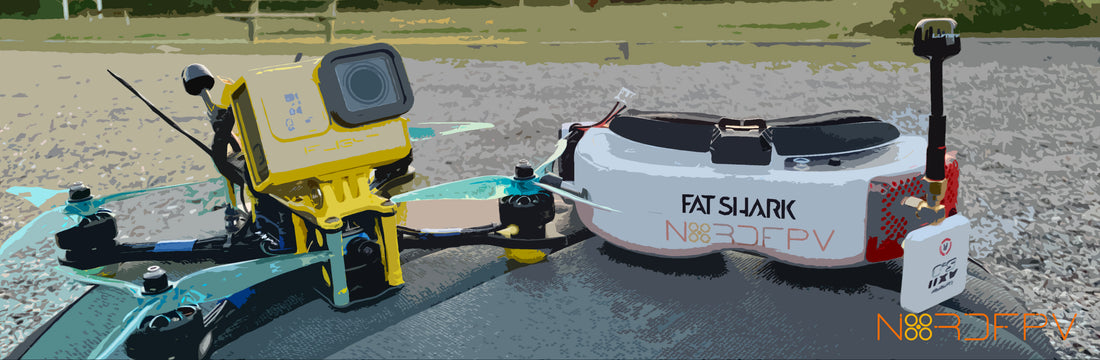
On the analog side, Fatshark HDO2 is the king. In the digital world DJI is the current winner. Going the digital way means you have to commit to DJI, and some people think it’s expensive.
I personally use the Fatshark HDO2. They fit great, Fatshark has a great customer support, and the image is just great, besides, if you check around the internet right now (Aug ‘20) there are already videos and images of a digital module for the Fatshark, we just need to wait for its release and start the digital competition.
And the batteries?
LiPO batteries are not your standard AA batteries that you buy at the store. LiPO has some characteristics that make it great for flying drones, but also complicated to understand how to take care of. There’s much to read and learn about it, but it's very common to use 4S batteries with a 5”. 6S is becoming popular but I still recommend to start with 4S. You will need a charger for your battery and never forget to connect the balance cable, otherwise it can actually be dangerous.
There are a huge amount of chargers, and the most confusing part, at least for me in the beginning, was to understand why some charges would not connect to my wall outlet, and instead require an external DC power supply. The answer to that question comes down to portability and field charging.
The batteries normally last for some single digits minutes, which means you should bring more than one for your trip if you want to spend some quality time, and many times people also recharge in the field, depending on the occasion.
In my opinion, unless you are a racer, I think it makes more sense to buy a good charger that can plug to your house outlet, and buy a decent amount of batteries that you can charge and bring with you the day you are going to fly. This way you can prepare the day before charging all your batteries and just take your bag and go the next day.
Just make sure to read about caring for these batteries. They should be stored at certain charge level to avoid degradation, they should never go under certain voltage per cell to avoid damage, and they shouldn’t stay fully charged for a long period of time.
Bye for now and happy flying!